I needed a quick, easy and inexpensive way to display place cards for a wedding. But, of course, I also wanted it to be really cute. So this is what I did...
The board is a piece of foam board, purchased at Walgreens for $4. This particular one is 22X28 and fit 45 standard sized place cards, so depending on the number of guests you may need multiple boards. The ribbon was from Walmart and was $1.47 a roll and I used about 1.5 rolls.
Step 1: I figured out how many cards I could fit across (five) and so I knew I needed 9 rows. To keep good spacing I measured out every 3 inches and used a pencil to mark the spot.
Step 2: Lay your ribbon across leaving about an inch and a half on each side. You can prepare ahead and cut all the ribbon at once.
Step 4: Continue taping the ribbons down the board, following your measured out pencil marks
to ensure each line is straight.
Step 5: Place the cards tented over the ribbon in alphabetical order and VOILA!!! Less than 30 minutes and under $8 and I had an adorable board that received many compliments! I set the board on an easel but thought a metal book stand on a table would be cute too, especially if you need more than one board.
Thursday, September 17, 2009
DIY Place Card Board
Sunday, September 13, 2009
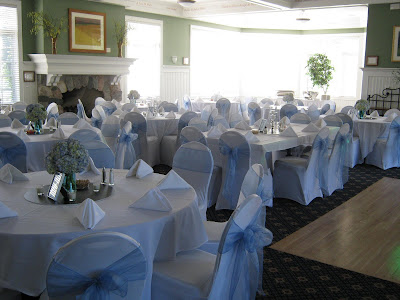
Stacy & TJ - Reception 09-12-09
My sister in law was married in North Carolina in June. They had a very small intimate ceremony with only close friends and family. So wanting to celebrate more and party with more friends and family we decided to throw them a reception here in Michigan this past weekend.
My Mother in law and I planned the reception and it turned out just wonderful. The bride wasn't allowed to see the room before it was finished and upon arriving for the reception she was speechless! Almost to tears, it was perfect, just what I was hoping for.
For dinner we chose to do stations of hors d' oeuvres, both hot and cold. All the guests loved the idea and I heard many people say they had more than enough to eat. (of course, I didn't get pictures of the stations!)
Venue: GVSU Alumni House, Allendale
Catering: GVSU Classic Fare Catering
Cake: Second Floor Bakery
Floral: Memorable Events
Glassware: Events by I. Candy
DJ: DJ Vybes
Photographer: Randy Willis
Chair Covers: Elegant Chair Covers


Thanks again to all the vendors for doing such an amazing job!
Congrats, Stacy and TJ, welcome to the family!
Keep an eye out for the DIY Place card board step by step post coming later this week!


